Five Types Of Planters For Container Gardening and Millwork
Do you love growing vegetables but lack a spacious backyard to follow your passion? You may try container gardening that gives you the freedom to grow your own food without requiring a lot of yard space. Container gardening has been around for a long time, and it has helped people grow batches of vegetables like carrots, tomato, and leafy greens without requiring a lot of space. You just need the right size of planters or containers to get started.
The containers may come in a variety of shapes, sizes, and types. From plastic and clay pots to wooden containers and barrels, you may use anything that holds enough soil and water. Here, we have created a list of the top five containers that can be used for container gardening in limited space.
Clay or Terracotta
Clay or terracotta containers are perhaps the most widely used planters for growing vegetables in the container gardening format. A clay pot is porous, so it has the ability to dry out quicker than other types of materials. Its level of porosity helps in keeping the soil from becoming too saturated.
The clay pots come in different sizes so you can choose the one depending upon the type of plant. If the roots tend to grow deep, we would recommend that you get a bigger size container that allows enough space for the plant to grow.
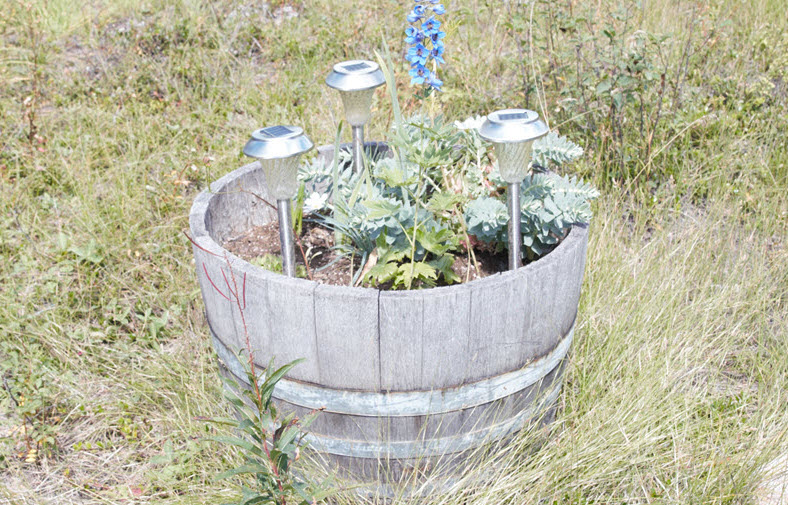
Wood Containers
Wood containers are another favourite with container gardening enthusiasts for their convenience and aesthetic appeal. The wooden containers come in different sizes and shapes such as window boxes, buckets, baskets, and barrels. If you are considering millwork for your home, you may get some custom designed wood containers to increase the value of your indoor garden.
Talk to the millwork company and tell them what you have in mind to come up with beautiful wooden containers to enhance the value of your property. The only problem with using wooden containers is that they tend to hold a lot of moisture. To prevent this, you may consider sealing the wood by putting another container inside it. You may consider using plastic or metal containers inside the wooden boxes or barrels.
Concrete Planters
Concrete planters take container gardening to a higher level, and they offer a kind of formal look to your garden. These containers may be made from concrete blocks or poured concrete. Creating concrete planters are easy, and you may even get the blocks free from a construction site and similar places.
While the concrete planters look and work great for container gardening, they tend to be heavy so moving them from one place to another can be hard. They may not be a suitable option for people living in rented homes.
Metal and Ceramic
If you are looking for lighter and attractive options, check out the planters made from metal and ceramic materials. They are not only bright and colourful, but they also come in decorative shapes to enhance the value of your indoor garden.
However, these types of decorative planters for container gardening often have drainage issues, making the roots too wet. To prevent this, you may use a different pot inside the decorative one to keep up the aesthetic appeal without compromising with the plant.
Plastic Pots
Plastic pots are another great option for container gardening, and they work best for allowing the seeds to germinate or small nursery plants to evolve with extreme care. The plastic pots come in different sizes, ranging from small plastic nursery containers to the large plastic planters.
If you wish to accommodate several small plastic pots together, you may consider a wooden cabinet to organize your space better and create enough room for all the small to medium-sized planters. The beauty of millwork is that you can come with your own custom designs to add beauty to every usable space in your home.
We would suggest that you have a look at this custom cabinet and millwork maker in Edmonton. They definitely have the experience needed to create custom wood cabinets and containers depending upon the space available. You will be surprised at the overall effect custom millwork can have on your indoor or outdoor garden.
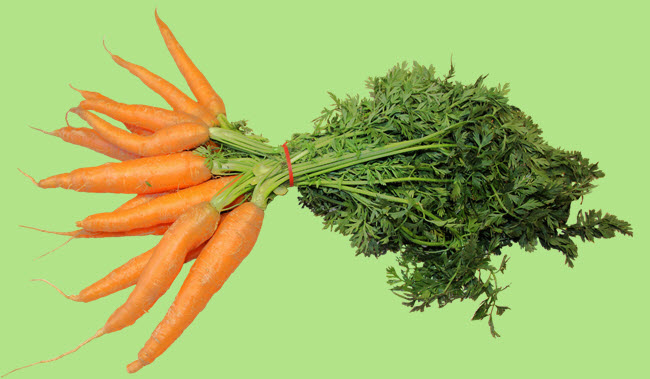 Sometimes it is hard to imagine growing vegetables in containers or planters that you can potentially eat in meals. However, when planted and maintained correctly vegetables and other edible plants can be grown in the smallest of places, including patios, rooftops, and sun rooms. Carrots are a great option for your container garden; they are full of nutritional value and are a great asset to many meals. In this article, we will review the best ways and techniques for raising container carrots.